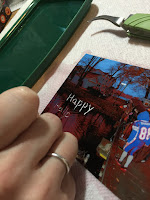
Image altering is pretty prevalent in this day and age of Photoshop and other editing software, but you can also alter photos after they've been printed. Today I'm going to show you one way to do that, by scratching some of the emulsion off the print.
Photographic emulsion is the coating on the photo paper that actually creates your image when the photo is processed. When dry, it is fairly hard and won't rub off or scratch easily. When wet and soft, however, it can be damaged. We are going to take advantage of this property.
What you'll need:
- a shallow tray of warm water (I use an old food container lid)
- a printed photo (professional and home printed both work)
- some scratching tools (I used a paper piercer, some tweezers, and a dry embossing tool.)
- paper towels
Step 1. Immerse your photo in the warm water for 30-60 seconds. It may start to curl up and expose parts of the photo to air. Just gently push it back down. Don't hold it under water, or the part under your finger may not get enough exposure to the water to soften, or you may accidentally scratch an area you don't want scratched.
Step 2. Remove the photo, shaking excess water off, and lay face up on a paper towel. (Do not dry off the front of the photo. Any water remaining on the surface will help the emulsion stay softer longer.)
Step 3. Choose a tool and begin "drawing" on the surface of the photo, using enough pressure to remove the emulsion layer but not enough to go right through the backing paper. Note: the sharper your tool, the easier it will be to scratch off the emulsion. If the emulsion still feels kind of hard and you're having difficulty removing it, soak the photo for another 30 seconds and try again. Also, if you've been working for a long period of time, you may need to stop and resoak periodically because the emulsion will harden as it dries. Different tools will produce different results, mainly in the width of the line you are able to scratch. My paper piercer can make a very fine line, while scraping the end of my tweezers across the paper makes a wider line.
 |
| dry embossing tool |
 |
| paper piercer |
 |
| tweezers |
Step 5. Set the photo aside to dry.
Now that you know the basics, you can start experimenting. Try different tools for scratching, like pens, Silhouette or Cricut tools, even sandpaper. I keep an art journal just for trying out new techniques. Sometimes I love the results, sometimes, not, but I always learn something. Here are some examples from my journal of when I played around with this technique in the past:
This is a picture of my kids on one of those airplane amusement park rides. I scratched away at the background to make it look like the plane was flying on it's own, while still leaving some of the background color showing. The smaller picture is a close up.
Here I did the same thing, but then colored over it with watercolor pencils.
This one is my favorite. It's my boys playing on the beach when we went to visit Grandma. The sandcastle, seashells, sun, and seagulls were all scratched in. Then I used a "Good Times" rub-on in the corner and matted it on summery patterned paper.


No comments:
Post a Comment