The problem comes when I go to scrap these events. I have a hard time narrowing down which photos to use, which means I've had to get creative in order to fit them all in. One of my favorite ways to do this is by using a flip element on my page.


Believe it or not, I fit 80 photos onto this 2-page layout! 36 are on the index card that came with my photo order from Shutterfly. Two others are scrapped the usual way on the right page. The other 42 are in the two flip albums I made. Here's how you can make your own flip album:
 |
| photo mats |
- one 5x6.5" cardstock mat for every two photos in your album
- one cardstock base (see directions for how to measure the size you'll need)
- adhesive (I like using a strong adhesive like Beacon's 3-in-1 because the mats will have weight from the photos and will be handled a lot while flipping, so you want a good strong bond)
Tools:
- Paper Trimmer
- Scoring surface and bone folder
Directions:
1. Determine how many photos will go in your flip album, and cut one mat for every two photos. In my example, I have 5 mats for 10 photos. Each mat will measure 5x6.5".
2. Cut a base from cardstock. The width will be 6.5". You'll need to do a little Math to figure out the height. The way you do this is to multiply the number of mats you have by 0.5, then add 4.5 to that answer to see how long your mat needs to be. For my example I have 5 mats, so 5 * 0.5 = 2.5 and 2.5 + 4.5 = 7. My cardstock base is 6.5x7".
 |
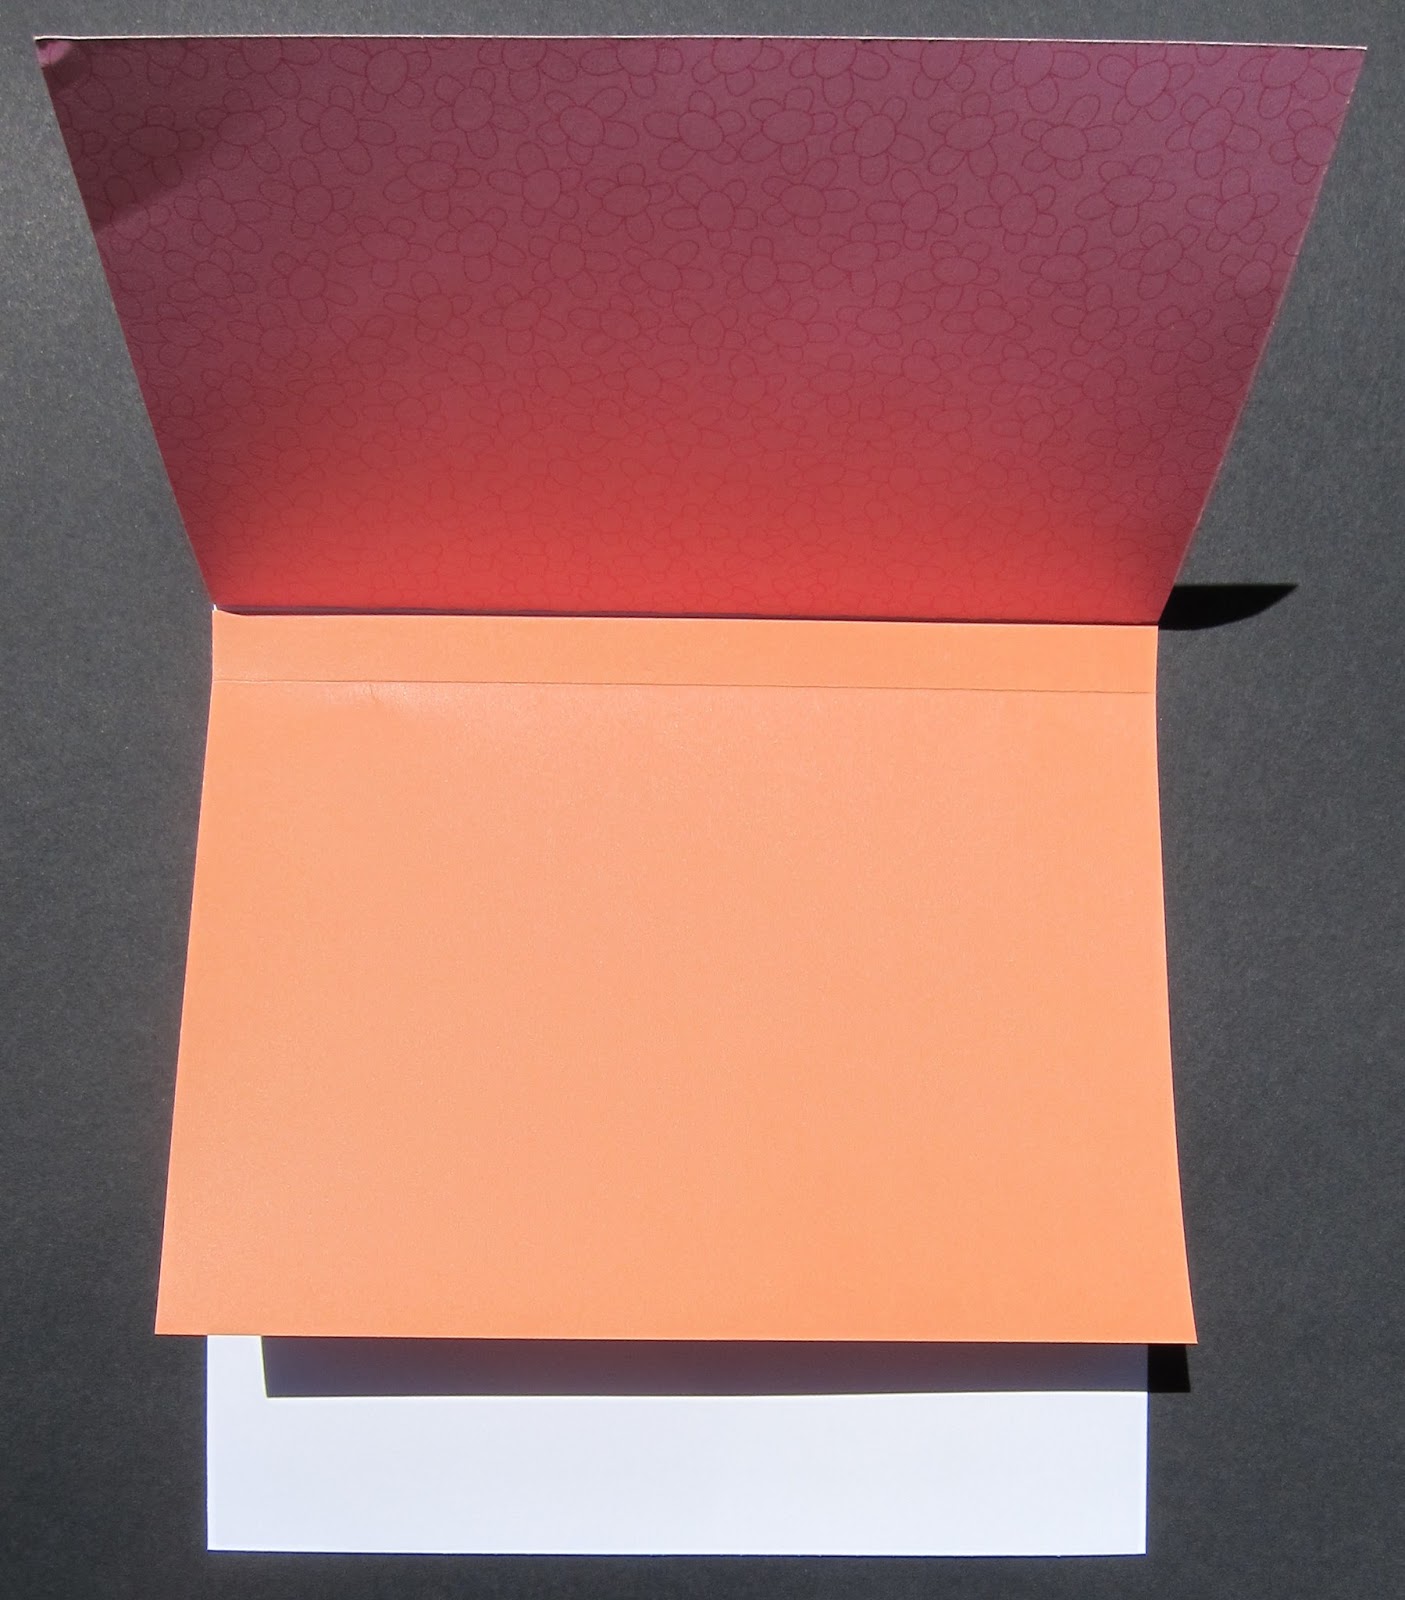
| Step 3 |
3. Score each mat 1/2" in along the 6.5" side. This 1/2" strip will anchor the mat to the base.
 |
| Step 4 |
4. Place adhesive along the 1/2" anchor strip. Attach the mat to the top of the base, lining up the anchor strip with the top edge of the base.
 |
| Step 5 |
5. Fold the first mat at the score line and lift up. Attach the second mat underneath the first, lining the top up against the scored edge of the first mat. Continue adding all mats in this way.
 |
| side view of 5 mats lined up together |
 |
| ready for photos! |
6. Your flip album is complete! Add photos as desired. Each side of a mat will fit one 4x6 or two 3x4 photos. The album can also be placed vertically or horizontally on the page to accommodate vertical or horizontal photos.
No comments:
Post a Comment